With Windows 11’s new hardware requirement of TPM 2.0, many organizations are scrambling to get their existing systems upgraded to TPM 2.0. The good news is that this all can be done remotely through most enterprise management tools (MEMCM, BigFix, Workspace ONE, etc). This blog will cover the exact steps on how to successfully upgrade TPM 1.2 to 2.0 on Dell Systems.
Pre-Requisites
- Download Dell Command Configure (CCTK). I’m using version 4.6 for this blog.
- Download Dell TPM 2.0 Firmware upgrade tool. I’m using V3 for this blog (Released Oct 1, 2021).
- Compatible Dell Hardware. Go here for the list.
- System upgraded to the latest BIOS
- Windows 10 system running in UEFI mode
- BitLocker Encryption
Prepare the System
I’ll be going through these steps manually, but you can take these and adapt them to your management tool of choice.
While most of these steps are included in Dell’s knowledge article, I found it lacking a few details. Also, in my environment, the WMI command was required to run as simply running “Clear-TPM” didn’t get the job done.
Copy CCTK and TPM Firmware update Files
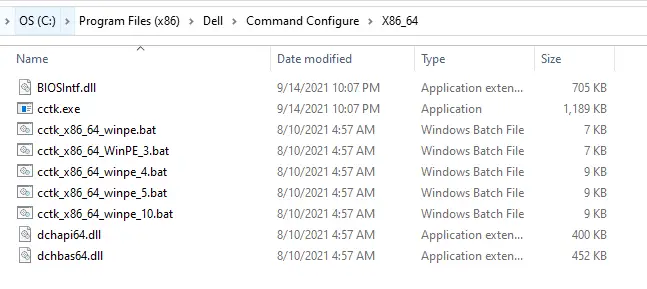
Download and install Dell Command Configure (CCTK). It should extract all of the files to C:\Program Files (x86)\Dell\Command Configure.
- Copy the contents inside of the “X86_64” folder
- Place contents onto target client into a temp folder. Let’s use C:\CCTK.
- Also put the TPM firmware tool, DellTpm2.0_Fw1.3.2.8_V3_64.exe, into that same folder for simplicity. It should look like this afterwards:
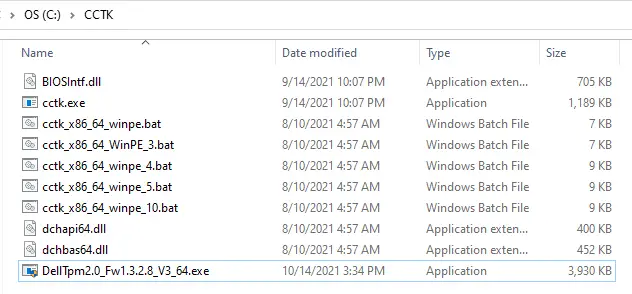
NOTE: You don’t actually need the batch files here. Those are only for adding CCTK into a WinPE environment for bare metal imaging. Feel free to leave those out of this folder if you prefer.
Suspend Encryption (BitLocker)
The assumption here is that you are using BitLocker for encryption with TPM. You will need to suspend BitLocker so that it doesn’t throw your system into BitLocker recovery mode. If you have third-party encryption that leverages TPM, you’ll need to engage the vendor on the proper steps.
Additionally, if you have a third-party vendor that manages BitLocker you may want to stop that service temporarily so that it doesn’t auto-resume. For example, here is how you can stop the McAfee MNE Service in PowerShell:
Get-Service -DisplayName "McAfee Management of Native Encryption Service" | Stop-Service -ForceThen to suspend BitLocker, run this PowerShell:
Suspend-BitLocker -MountPoint "C:" -RebootCount 1And finally, we’ll need to disable “TPMAutoprovisioning” so that Windows doesn’t automatically take over ownership. You can do this by running:
Disable-TpmAutoProvisioningClearing the TPM
Now we need to run a few commands in CCTK in order to prepare the TPM chip for the upgrade.
Set a temporary BIOS password if you don’t already have one set. This is required in order to run the TPM PPI Clear Override command:
c:\cctk\CCTK.exe --SetupPwd=Colorado -l "%TEMP%\TPM-Settings.log"Then set TPMPPIClearOverride to enabled. This allows you to remotely clear the TPM without physical interaction.
c:\cctk\CCTK.exe --TpmPpiClearOverride=Enabled --SetupPwd=Colorado -l "%TEMP%\TPM-Settings.log"Then we need to clear the TPM. Normally you can just run the Clear-TPM PowerShell command. In my environment, I kept running to this error:
Clear-TPM: An owner authorization value is required to be applied

We tried tons of different things in order to fix this error, but we were never able to get it working. So instead, we had to call this command via WMI and it worked:
(get-wmiObject -class Win32_Tpm -namespace root\cimv2\security\microsofttpm).SetPhysicalPresenceRequest(22)If you look at the WMI class documentation for this, you can see that “22” corresponds to:
Enable + Activate + Clear + Enable + Activate
Enable, activate, and clear the TPM, and then enable and reactivate the TPM.
Now, reboot the system.
Here are all of the commands in one place:
#Prep for TPM Upgrade

#Stop MNE Service
Get-Service -DisplayName "McAfee Management of Native Encryption Service" | Stop-Service -Force

#Suspend BitLocker
Suspend-BitLocker -MountPoint "C:" -RebootCount 1

#Disable TPM Auto Provisioning
Disable-TpmAutoProvisioning

#Set BIOS Password
c:\cctk\CCTK.exe --SetupPwd=Colorado -l "%TEMP%\TPM-Settings.log"

#Enable TPM PPI Clear Override
c:\cctk\CCTK.exe --TpmPpiClearOverride=Enabled  --SetupPwd=Colorado -l "%TEMP%\TPM-Settings.log"

#Clear TPM
(get-wmiObject -class Win32_Tpm -namespace root\cimv2\security\microsofttpm).SetPhysicalPresenceRequest(22)

#Restart Computer
Restart-Computer
Upgrade TPM Firmware from 1.2 to 2.0
After the system reboots, the TPM has been cleared and TPMAutoprovisioning disabled so Windows won’t take over ownership.
Next, we need to pause BitLocker management service again (if applicable) as well as suspend BitLocker. Then we just need to flash the TPM chip by running this command:
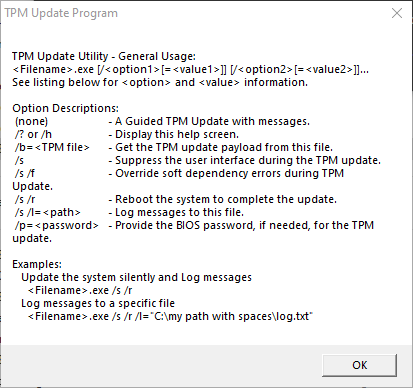
C:\CCTK\DellTpm2.0_Fw1.3.2.8_V3_64.exe /s /forceit /p=Colorado -l "%TEMP%\TPM-Settings.log"You’ll note I am using an undocumented switch called “/forceit” instead of just the regular “/f”. We found a few instances where “/f” didn’t fully force the upgrade. There are a few other commands you can run against this exe. Here they are for reference:
Reboot the machine. The TPM should get successfully upgraded to 2.0 without any physical interaction. Here are the full steps:
#TPM 2.0 Upgrade Steps

#Stop MNE Service
Get-Service -DisplayName "McAfee Management of Native Encryption Service" | Stop-Service -Force

#Suspend BitLocker
Suspend-BitLocker -MountPoint "C:" -RebootCount 1

#Flash TPM chip to 2.0
C:\CCTK\DellTpm2.0_Fw1.3.2.8_V3_64.exe /s /forceit /p=Colorado -l "%TEMP%\TPM-Settings.log"

#Restart Computer
Restart-Computer
Post Upgrade Steps
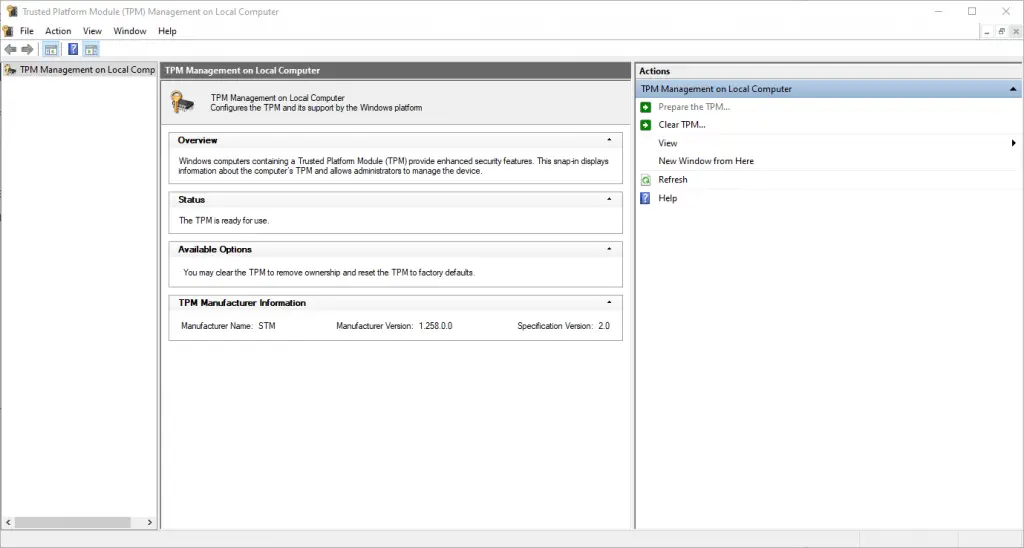
After the machine comes back up, verify that TPM has been upgraded to 2.0 by launching TPM.msc or by running Get-TPM in PowerShell.
Upgrade complete! Now we just need to reverse the commands we ran in the prep stage:
#Post Upgrade Steps

#Disable TPMPpiClearOverride
c:\cctk\CCTK.exe --TpmPpiClearOverride=Disabled --SetupPwd=Colorado -l "%TEMP%\TPM-Settings.log"

#Remove BIOS password
c:\cctk\CCTK.exe --SetupPwd=  -ValSetupPwd=Colorado -l "%TEMP%\TPM-Settings.log"

#Enable TPM Auto Provisioning
Enable-TpmAutoProvisioning

#Re-Initialize TPM
Initialize-TPM

#Resume BitLocker
Resume-BitLocker C:
Conclusion
After putting these pieces together, you are well on your way toward upgrading all eligible systems to TPM 2.0. This not only protects them from some of the known vulnerabilities of TPM 1.2, but it paves the way for upgrading to Windows 11.
For more information on how to install Windows 11 or how to add TPM chips to VMware Workstation, check out my blogs here and here.

Hi my friend,
I am trying to upgrade TPM from 1.2 to 2.0 version but the system says: “tpm update blocked by fw policy”.
Can you help me with a remote help by Anydesk or TeamViewer?
Regards
Hi Andi – What model is having this issue? This person had a similar issue as you, may be worth checking out. https://www.dell.com/community/Precision-Fixed-Workstations/Update-Failed-Blocked-by-TPM-FW-Policy/td-p/8083444.
I do some consulting on the side with my business by the hour, so I you are interested in pursuing that let me know.
Same issue hear. Can’t get past the tpm update blocked by fw policy error. Had hoped it was the BIOS password requirement that I hadn’t seen mentioned anywhere else, but nope. I’ve searched everywhere and tried all settings I can think of too – any other ideas? Current tpm version is 5.81.2.1.
As far as I’ve seen, if you can’t get past that error then it is most likely something wrong with the hardware and a dell support ticket is in order. https://www.dell.com/community/Precision-Fixed-Workstations/Update-Failed-Blocked-by-TPM-FW-Policy/td-p/8083444