Windows 11 was officially released on October 5th, 2021. It brings an updated UI (and start menu), new security enhancements, as well as performance improvements. I don’t know about you, but I am very excited about this! In this blog, I’ll detail some of the new pre-requisites Windows 11 has that Windows 10 didn’t and how to install the official version of Windows 11.
Pre-Reqs
Windows 11 has a number of minimum hardware requirements. Most are not ones you’ll need to worry about too much but there are a couple, in particular, that might be a blocker.
The first is that your system must be running in UEFI mode. The majority of new systems that have shipped in the last few years or so should have already been set to this mode. However, if you upgraded from Windows 7 and never “converted” to UEFI mode, then this may be an issue.
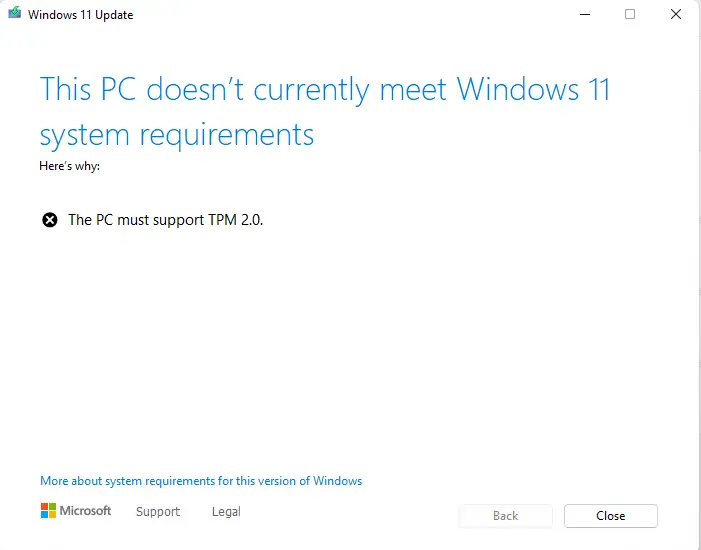
The second requirement is having a Trust Platform Module 2.0 (TPM) chip. Even if your systems have TPM chips, not all may have the newer 2.0 firmware type (some may still be on 1.2). If you try to upgrade a Windows 10 PC without a compatible TPM 2.0 chip, you’ll see this message:
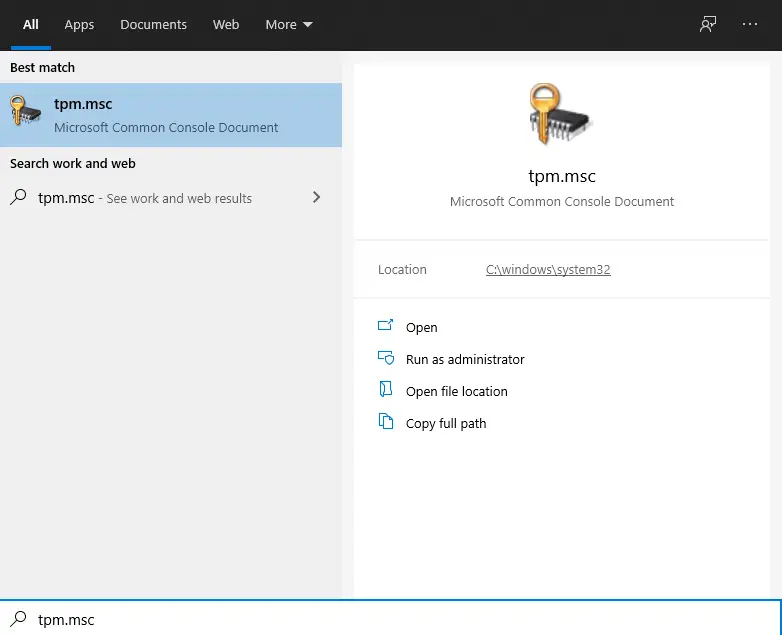
The quickest way to check is by launching tpm.msc (either from Win + R or searching windows)
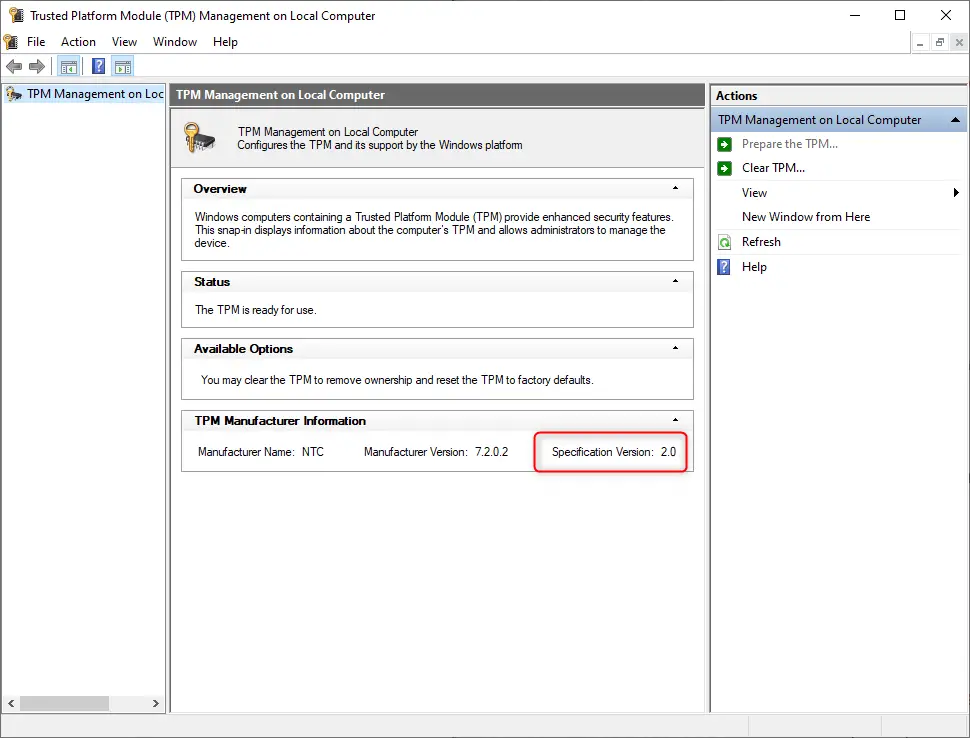
And check the “Specification Version” toward the bottom.
Each vendor has its own tools for updating the firmware to version 2.0. Here are some handy links for guides to each:
Dell
HP
Lenovo
MS (Surface devices)
Additionally, installing a virtual TPM for testing on either VMware Workstation or Hyper-V is simple to do as well. Check out my other blogs on how to do that:
How to add TPM to a VMware Workstation VM
How to add TPM to a Hyper-V VM (coming soon)
How to add TPM to a VSphere VM (coming soon)
While I’ve highlighted two of the more common blockers for installing Windows 11, let’s still do a full check. There are a couple of useful tools available that can tell you if your hardware will run Windows 11.
Run PC Health Check App
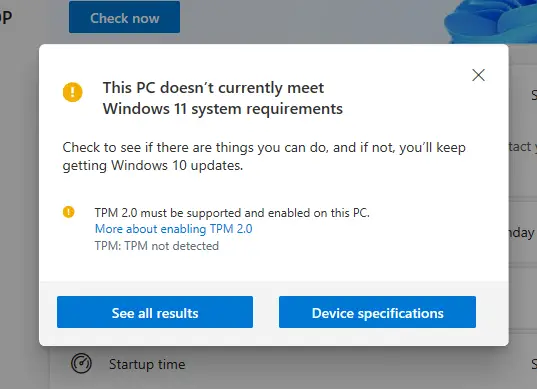
The PC Health Check App is an easy way of checking eligibility. Simply download and run the MSI file to install it. This tool is primarily meant for consumer PCs and may not work on enterprise-managed PCs where you are managing windows updates. You may, like me, get this message after running the app. If so, skip to the next section about running the PowerShell script. Otherwise, continue on.

If it successfully runs but you have a blocker, you may see a message like this one:
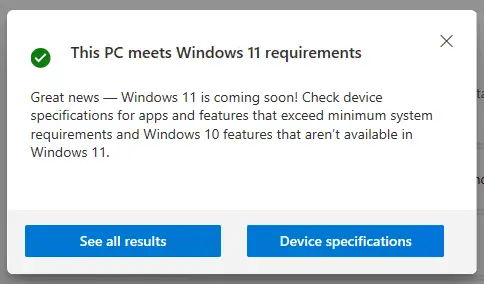
Otherwise, you should see this:
Now let’s move on to running Microsoft’s hardware readiness PowerShell script to check for compatibility.
Run Windows11HWReadiness.ps1 with PowerShell
Microsoft just recently published a blog detailing a new hardware readiness report in Endpoint Analytics as well as a handy PowerShell script that can be run on the client. You can follow the steps in the blog on how to run the script or follow an even simpler way. Thanks to Frank Lesniak on Twitter for pointing this out!
- Launch PowerShell ISE (or VSCode) as administrator
- Paste in this script to both download and run the script:
Set-ExecutionPolicy -ExecutionPolicy Bypass -Scope Process -Force

Invoke-WebRequest -Uri 'https://aka.ms/HWReadinessScript' -OutFile .\Windows11HWReadiness.ps1

. .\Windows11HWReadiness.ps1
- After running, you should see a small table as well as a json output. Here is what mine looks like.
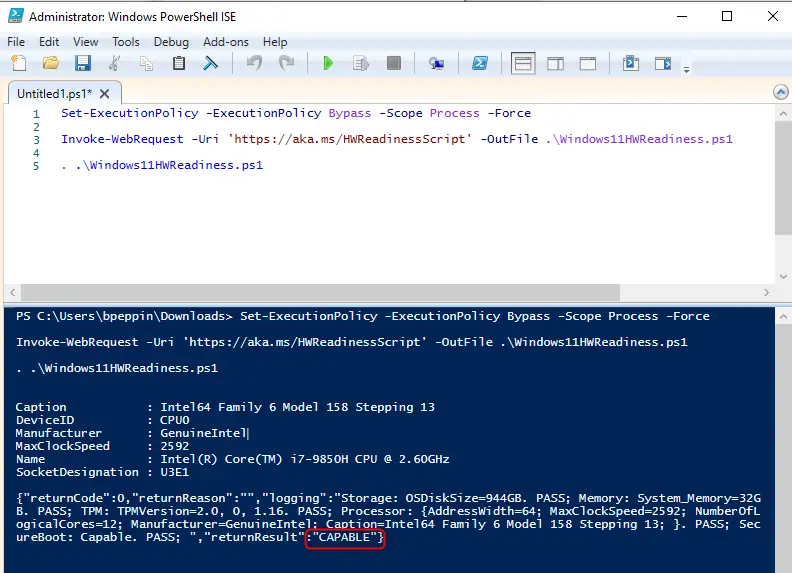
Look for the value under “returnResult” and if it says CAPABLE you are good to go.
Ok, now let’s move onto the fun part — actually installing Windows 11. We actually have quite a few ways available to us and I’d like to walk through each one. Pick the best one for your use case.
A Few Different Methods
Microsoft has released an updated page that includes links to download and setup Windows 11. I’ll be walking through each of these methods including a bonus method for even faster deployment. Here is a quick summary of each and why you should use them:
| Windows 11 Installation Assistant | Use this to upgrade the system you are currently on. |
| Create Windows 11 Installation Media (ISO) | Use this to create bootable USB or ISO install media. The next option is for downloading the ISO directly so really just use this if you want to setup a normal, bootable USB drive. |
| Download Windows 11 Disk Image (ISO) | Use this to create bootable media in ISO format that can be any language or version. Additionally, you can use this to import into deployment tools like SCCM or MDT to do imaging. |
| Windows 11 Zero-Touch USB | This is similar to the 2nd option, but it will install with an autounattend.xml file that allows for zero-touch install (no clicking through Windows Setup screens) |
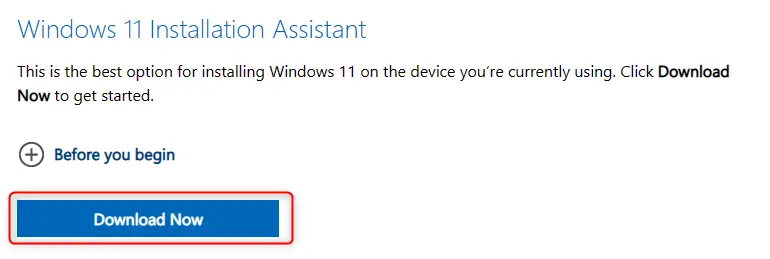
Windows 11 Installation Assistant
Use this to upgrade the system you are currently on. It will download Windows 11 files and perform an “in-place upgrade”, keeping all of your files, apps, and settings.
- Click Download Now under the “Windows 11 Installation Assistant”. If prompted to run or save, click save.
- This will download a file called Windows11InstallationAssistant.exe. Click it to run the program.
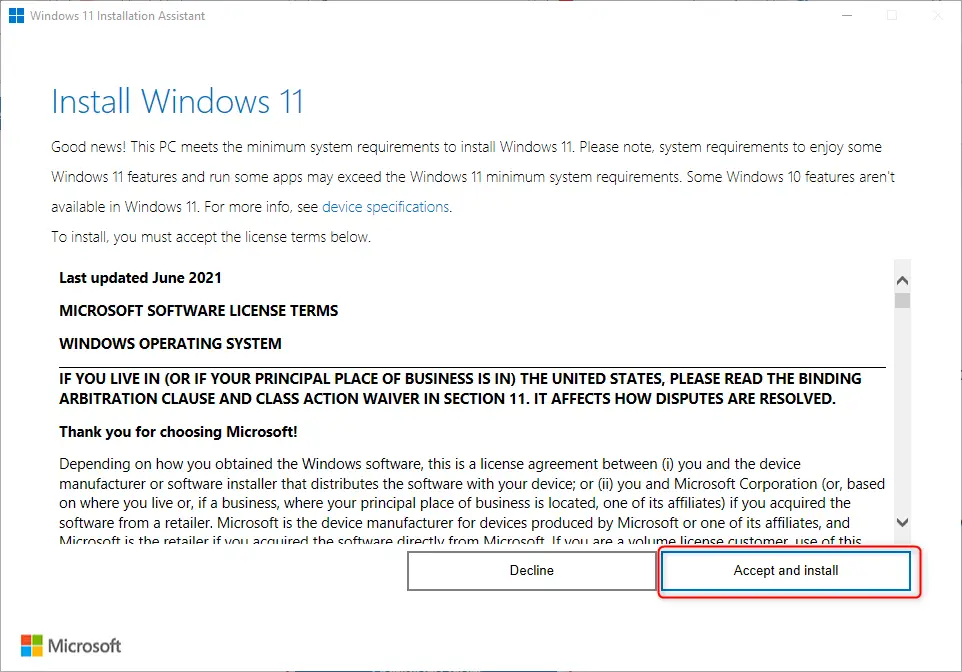
- If you haven’t yet run the PC Health Check App, it will prompt you to run it and refresh.
- If your PC meets the system requirements, you should see this screen. Click Accept and Install.
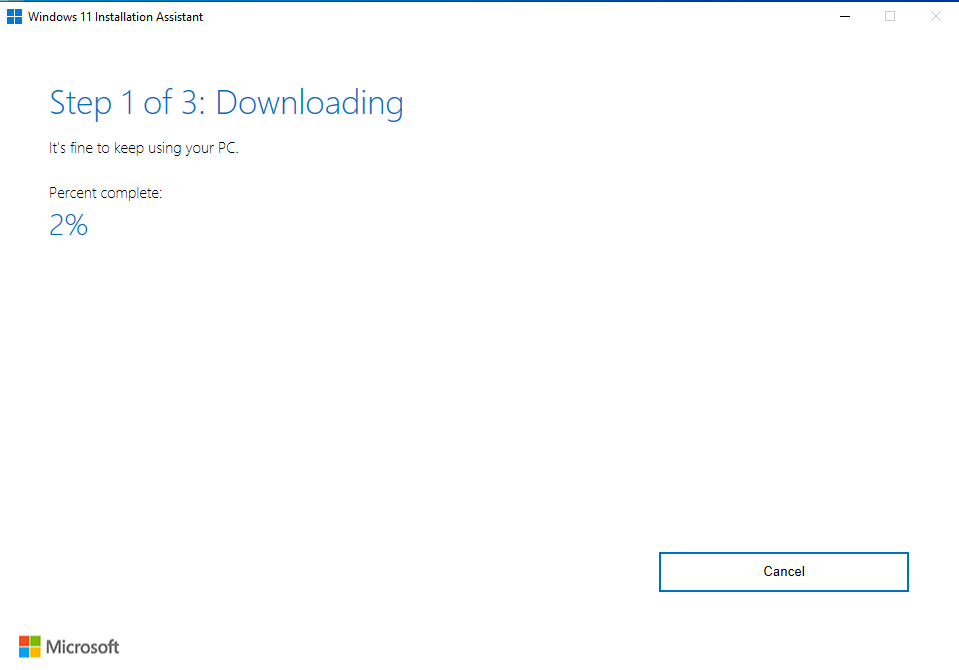
- Setup will download the Windows 11 bits and begin installing
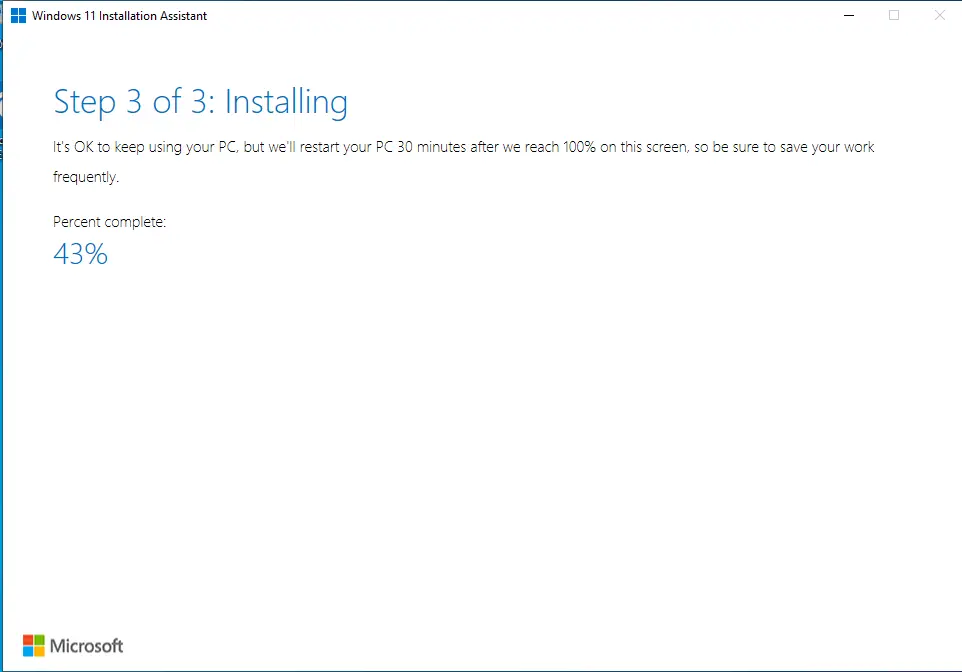
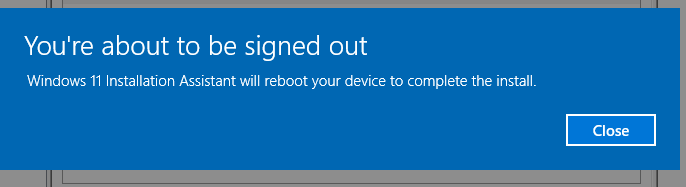
- After the initial setup is finished, it will prompt you to restart the computer as well as a countdown timer for when it will auto-reboot. Click Restart Now if you are ready.
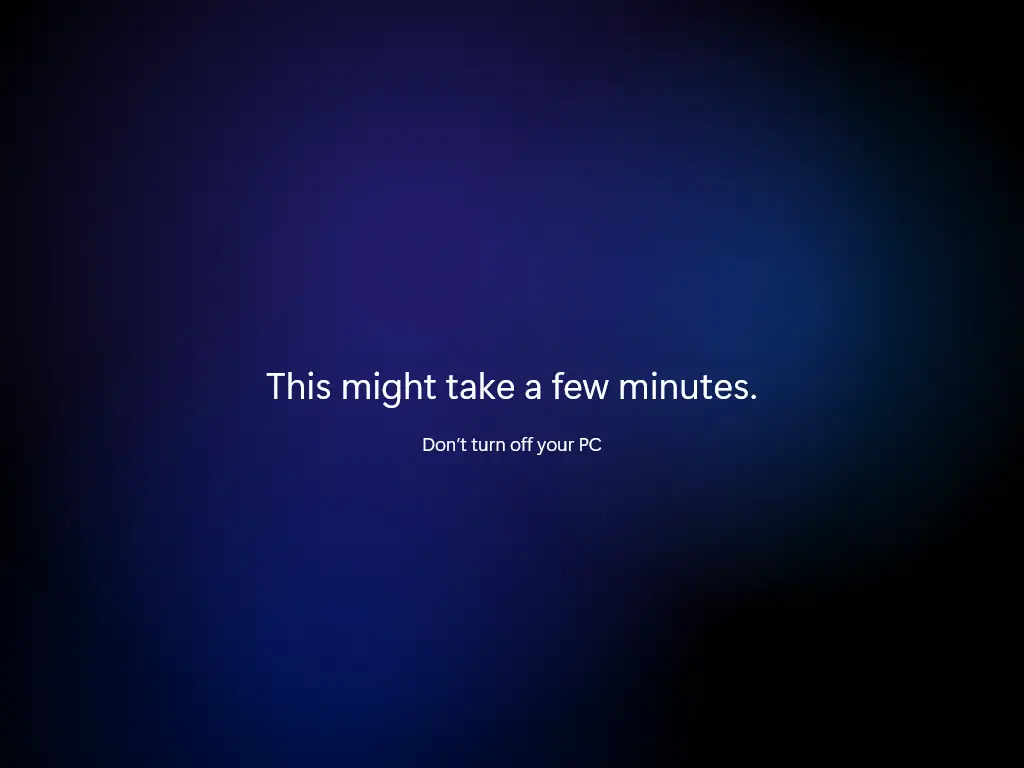
- You’ll then be treated with new pretty upgrade screens
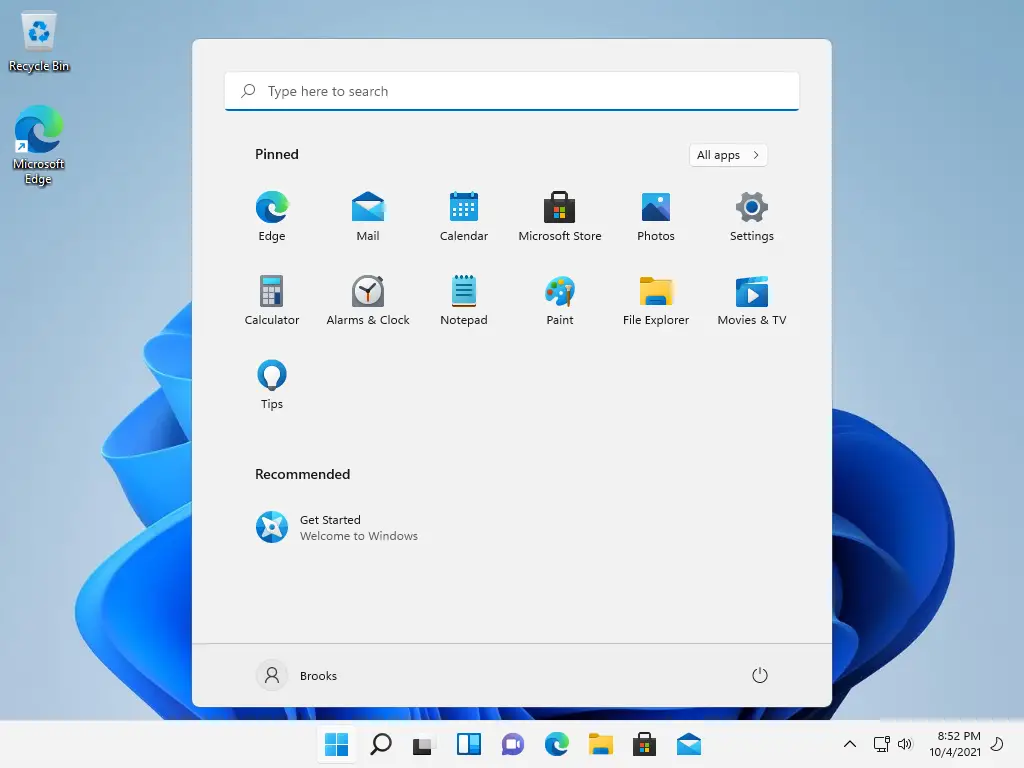
After a little while, the upgrade will complete! Welcome to Windows 11.
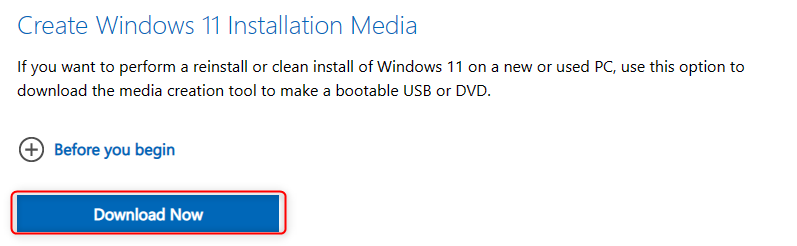
Create Windows 11 Installation Media (USB or ISO)
Use this to create either bootable USB or ISO install media. This tool can automatically format your USB key and make it bootable which is quite nice.
- Under “Create Windows 11 Installation Media”, click Download Now. If prompted to run or save, click save.
- This will download a file called MediaCreationToolW11.exe. Click it to run the program.
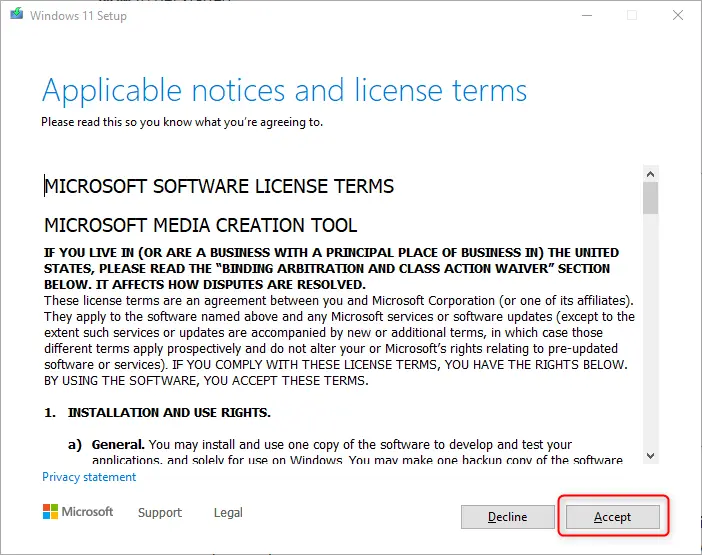
- It will download a few things in the background and then present you with terms of use. Click Accept to continue.
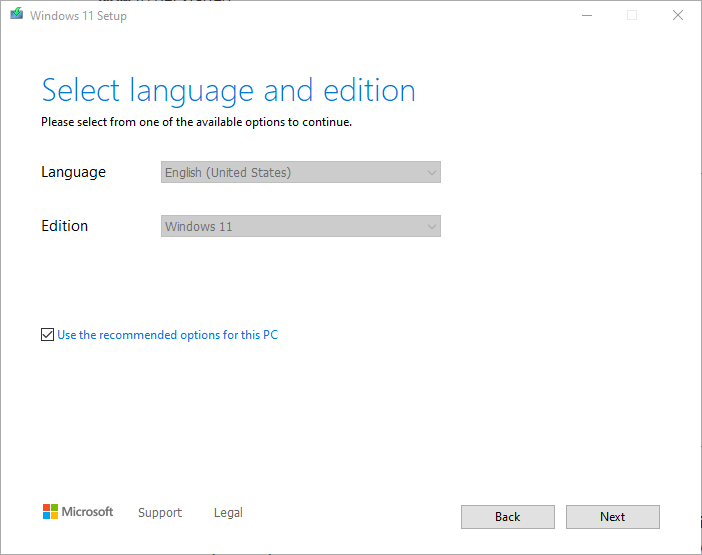
- It will then automatically select your language and Windows 11. If you want to change the language, you can un-tick the box “Use the recommended options for this PC”. Click Next.
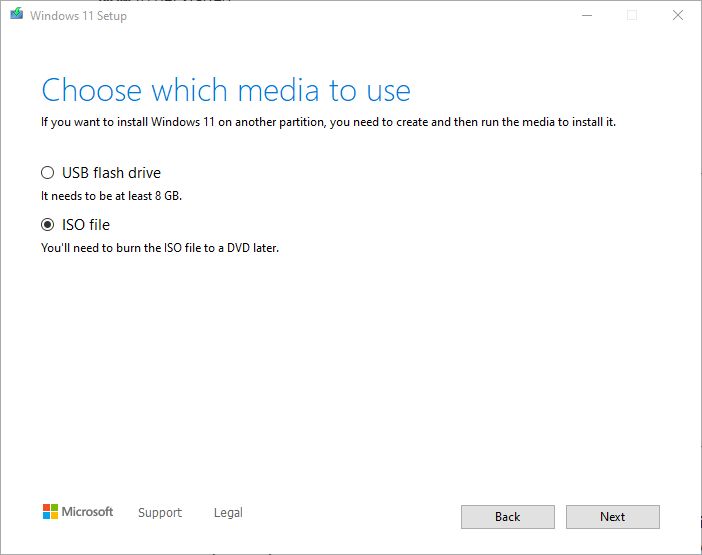
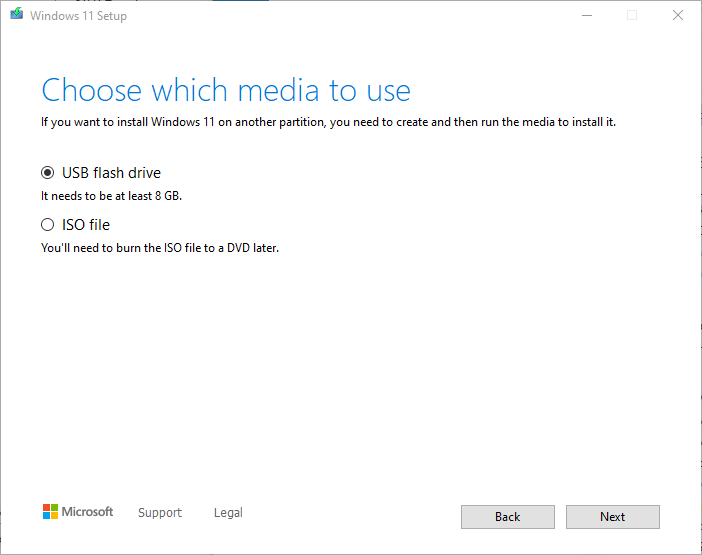
- Select which media type to use: USB or ISO. Jump to the correct header below for the steps you need (either ISO or USB)
Steps for ISO
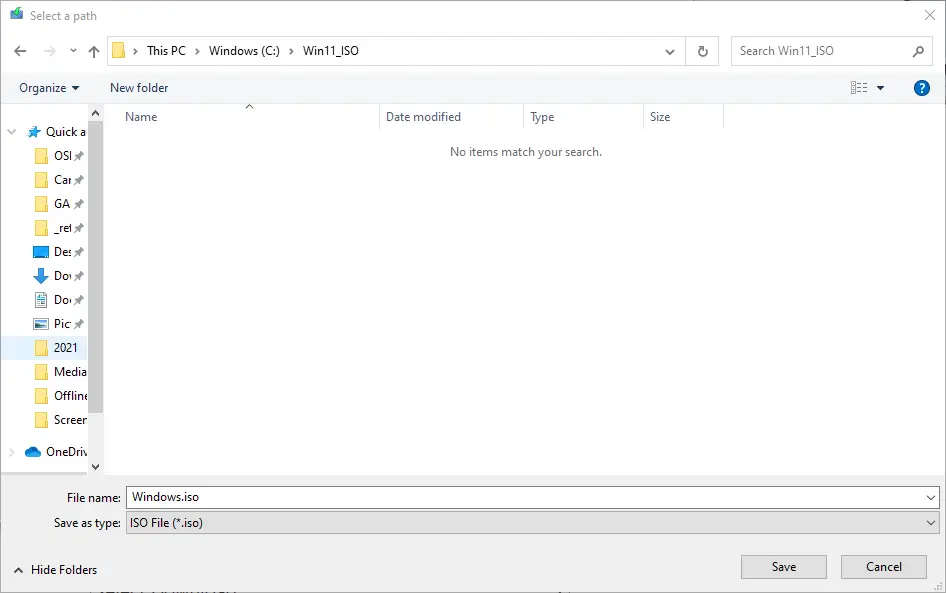
- Select a directory to save the file and click Save.
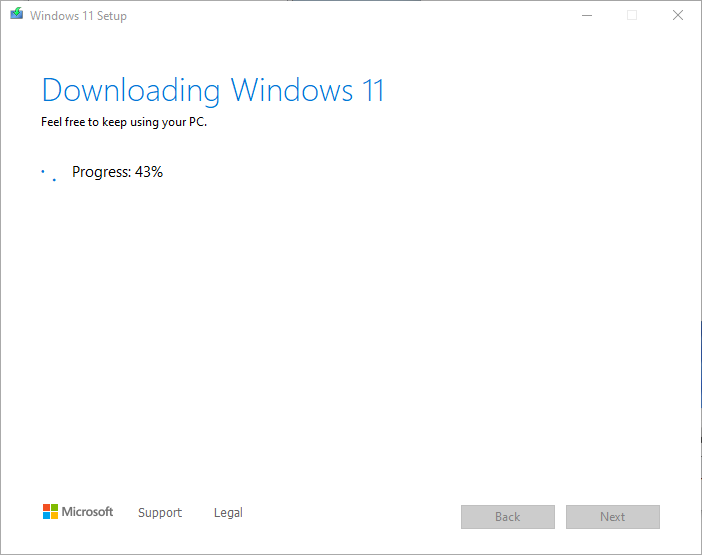
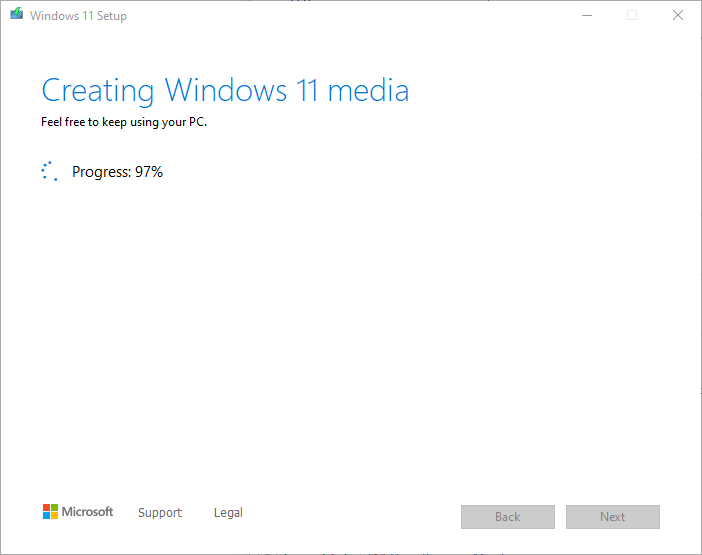
- Windows 11 setup will then download all of the necessary files and create a bootable ISO file.
- When finished it will show you this screen asking you to burn it to a DVD. Do any PCs that support Windows 11 PCs include a DVD player? Obviously you probably won’t do this but instead use this ISO to setup VMs.
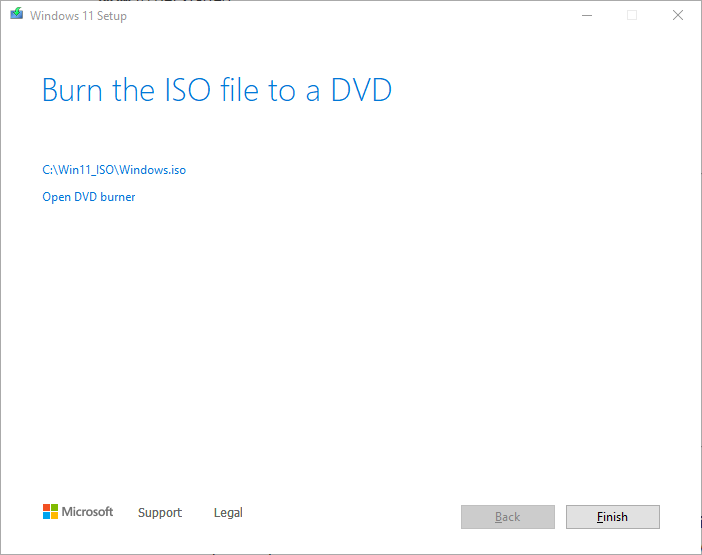
- After clicking Finish, navigate to the folder and you should see a “Windows.iso” file there around 4.3 GB in size.

Steps for USB
One thing about this process that is worth noting is that each time you run this, it will need to re-download the full setup files each time. If you want a way to create a bootable USB with an already downloaded ISO, check out the section below.
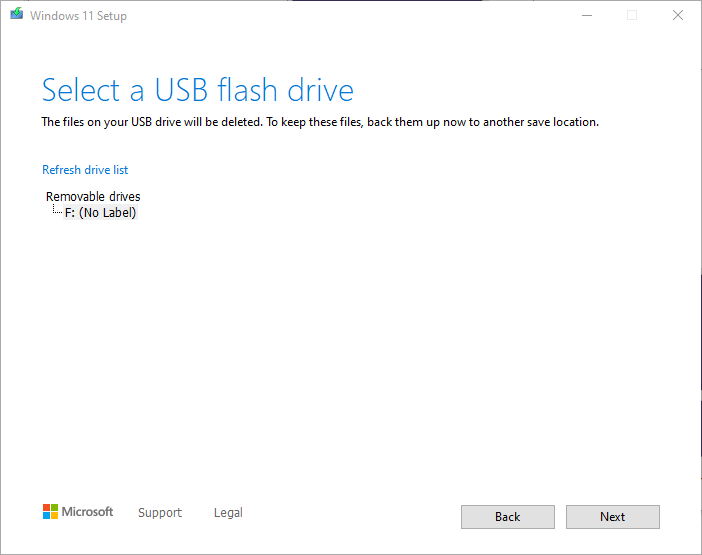
- Instead of selecting ISO, select USB flash drive. Click Next.
- Select the USB drive and click Next. Remember that this will completely format the USB key so make sure you’ve saved off any data.
- Windows 11 setup will then download all of the necessary files.
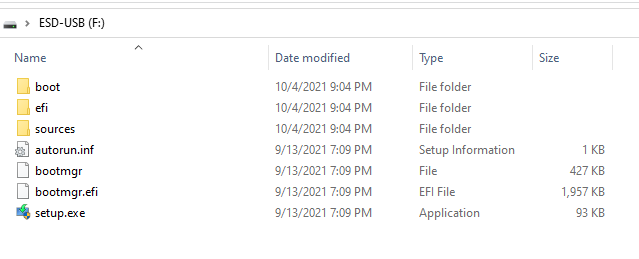
- It will then format the USB key, copy the files to it, and make it bootable.
- When complete, it will say your USB flash drive is ready.
- Browse to the drive and you should see it titled “ESD-USB” and contain the setup files.
Download Windows 11 ISO
Use this method to download a multi-edition ISO (meaning it has all of the versions: Pro, Home, Enterprise, etc). You can then use this to import into SCCM or MDT or create a zero-touch USB key (see next section).
For enterprise customers, you can also download the ISO as well via MSDN (my.visualstudio) or Volume Licensing Site.
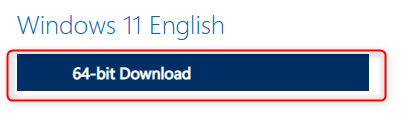
- In the dropdown, select Windows 11 and click Download

- It will then ask you to select language. Pick the correct language from the drop-down. Click Confirm.
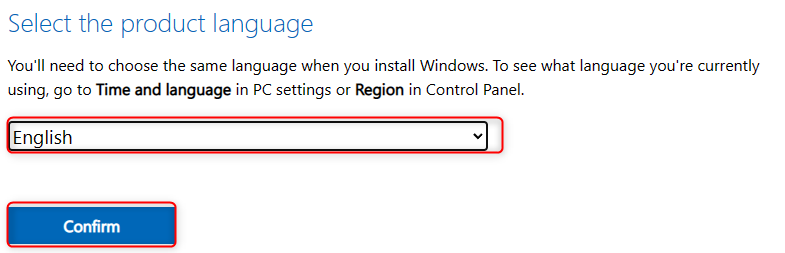
- Click on the 64-bit Download button to download the ISO
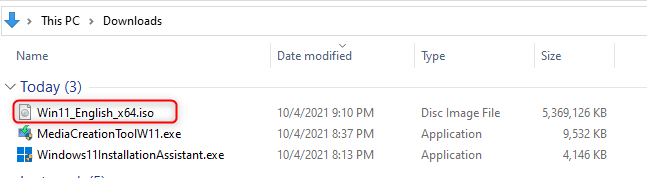
An ISO titled “Win11_English_x64.iso” should have been downloaded. Note that because it has all of the editions it in, it will be larger in size.
Create Windows 11 Zero-Touch USB
Use this process to set up a USB key so that it can install Windows 11 automatically without any clicking through setup screens. I have a whole separate blog detailing this process so head over there to get the full step-by-step walkthrough.
It involves just a few steps:
- Mount the ISO you just downloaded (Right-click > Mount)
- Run script that will then format the USB key and create an autounattend.xml file to make it zero-touch
- Boot to USB drive and install Windows 11
Conclusion
In this blog, you’ve learned some of the easy ways of how to install Windows 11 today. There are numerous other methods including SCCM, MDT, Intune, WS1, and others. I hope to have blogs on each of those soon. Have fun deploying Windows 11!