
Intro
I’ll be showing how to add full WiFi support to WinPE in MDT for Dell systems. This will also include adding WiFi support even outside of WinPE so that the entire MDT task sequence can complete end to end. Massive props to Oliver Kieselbach on his blog post that started it all and has most of the steps we need. Definitely check it out! I’ve just modified it slightly and added additional steps to include OSDBuilder, Dell drivers, and full task sequence support. Before we start, here is a list of all the steps we will be doing from a high level:
- Use OSDBuilder to mount and update our WinPE (which is actually WinRE since that has the wireless modules we need)
- Add Dell wifi drivers (2 methods)
- Replace default MDT boot image with our updated WinRE one
- Create some additional “Extra Files” that will tie everything together
- wlan.cmd to initiate and connect to your wifi network
- unattend.xml to modify the startup sequence of the MDT boot image
- Slightly modified ztiutility.vbs file to make MDT support wireless
- Add a few extra command lines to our Task Sequence to get wifi to automatically connect after the system reboots from WinPE
- Customized unattend.xml for the Task Sequence so Wifi automatically connects in administrator account
Pre-Reqs
- Latest MDT installed (I tested with 8456)
- Windows 10 ISO from VLSC or MSDN
- Dell hardware, preferably ones with Intel Wifi cards
- Ready to have some fun
Create updated WinRE
For this, we’ll be using OSDBuilder which will automate the updating and creation of WinPE, including using the WinRE version which has Wireless support. Native WinPE from ADK does not.
Launch an administrative Powershell window
Type Install-Module -Name OSDBuilder -Force
Type “Y” when prompted to install Nuget.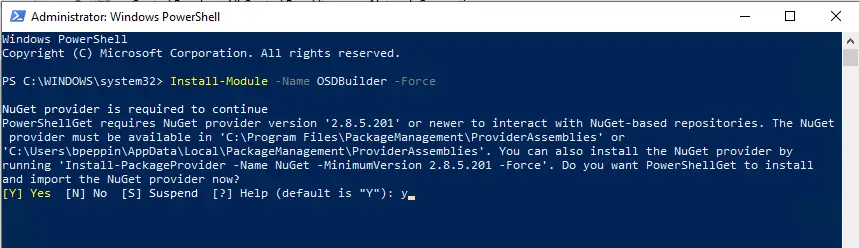
I’ll be using the WinRE from Win10 1809 media downloaded from Microsoft Volume Licensing site. Mount the ISO.
Type Import-OSMedia. It should scan and find your mounted Win10 media. Select the appropriate edition (if applicable) and click ok.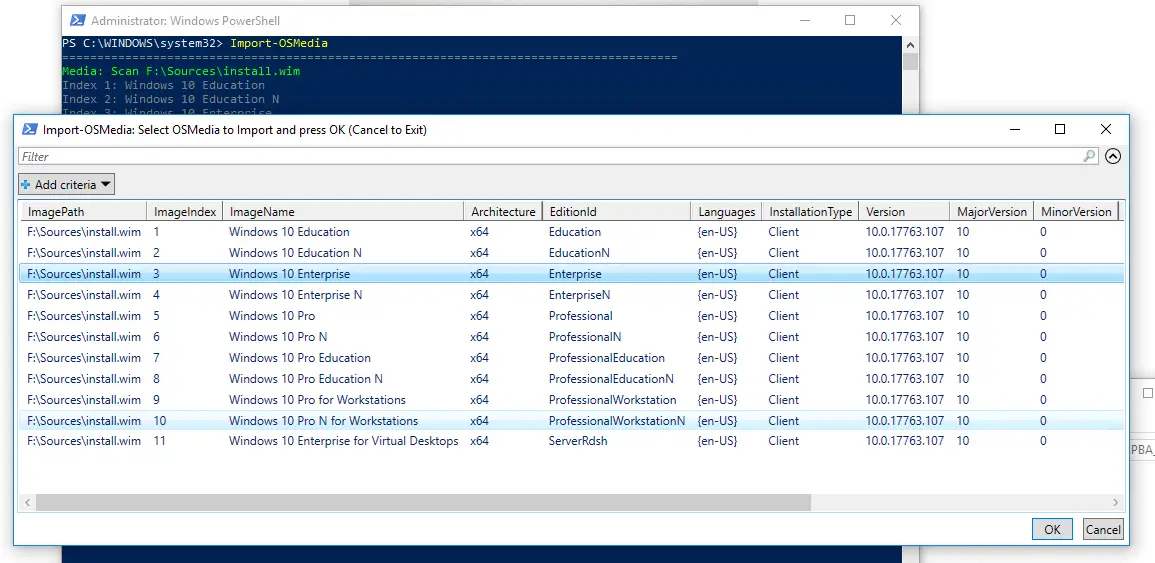
Media will be imported.
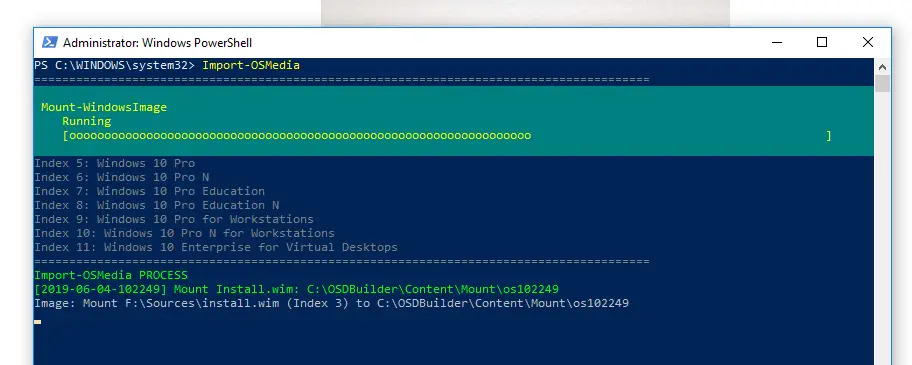
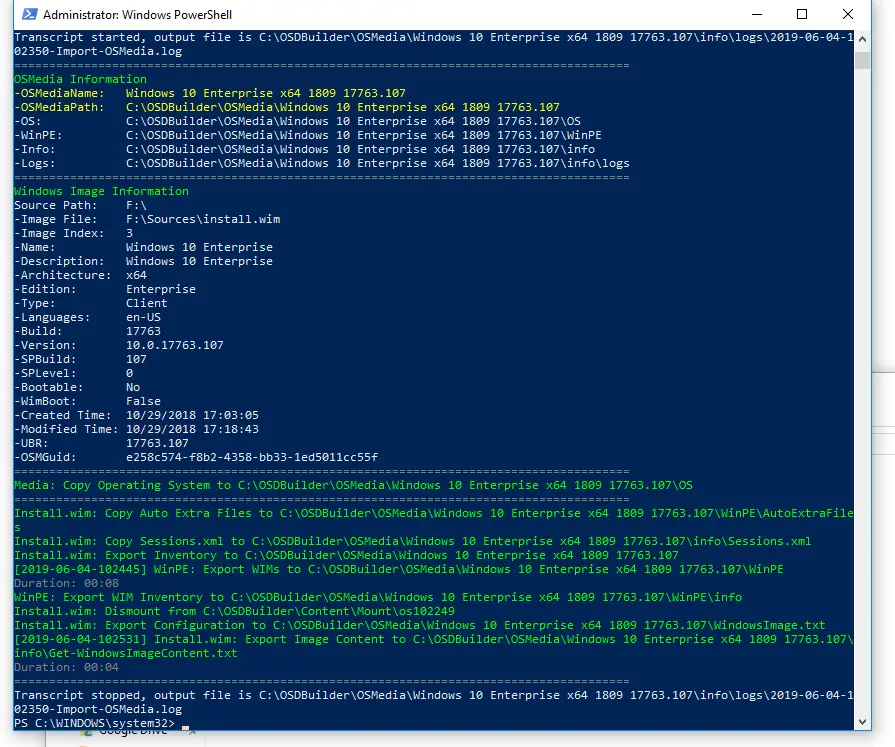
Once complete it will show you the path where your mounted OS media is stored.
Optional: Run Update-OSMedia -Download -Execute. This will download necessary updates for both the OS and winpe/winre and then apply to the image. This isn’t required to do but always a good idea. It can take quite some time though so be patient. For more info go here: https://www.osdeploy.com/osdbuilder/docs/basics/update-osmedia.
While that is running, download Dell WiFi drivers. Most of the Dell enterprise platforms should use similar WiFi cards (usually Intel) and thus you can most likely pick one of the newer models you have in your environment and it should work with most. I had pretty good luck using the Win10 X64 driver CAB for Latitude E7470. Wifi worked on the following systems once injected into WinPE.
- Dell Latitude 7490
- Dell Latitude 7480
- XPS 13 9360
- XPS 13 9365
- Precision 5510
Try one set and see if it works, you can always inject more later. You will also want to download the standard WinPE 10 driver CAB. These are all located here:
You have 2 ways to inject drivers:
Option 1 – Import into MDT
The main reasons for doing it this way is if you already have your system drivers imported into MDT, you can simply add the network ones to WinPE via the Workbench. It also gives you a visual way of managing them.
Download the CAB(s) (If you don’t want to do this manually, use this awesome tool! https://gallery.technet.microsoft.com/scriptcenter/Driver-Tool-Automate-9ddcc010). In my case I’m just using the Dell E7470 driver cab.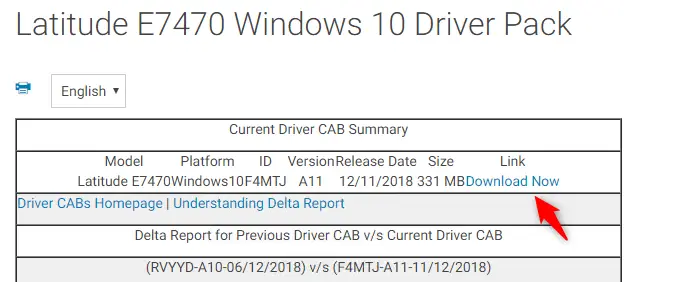
Use 7zip to extract to a folder.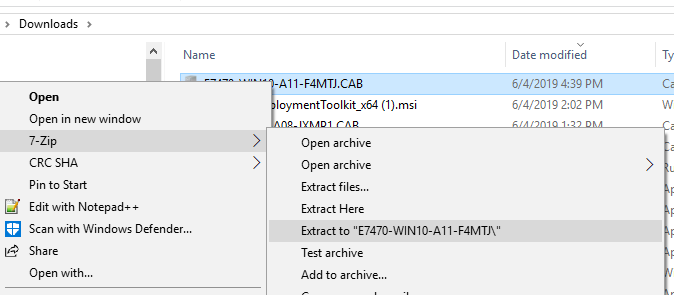
Create a folder for the model you downloaded in the Out of Box drivers section.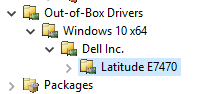
Right click the model and click Import Drivers.
Input path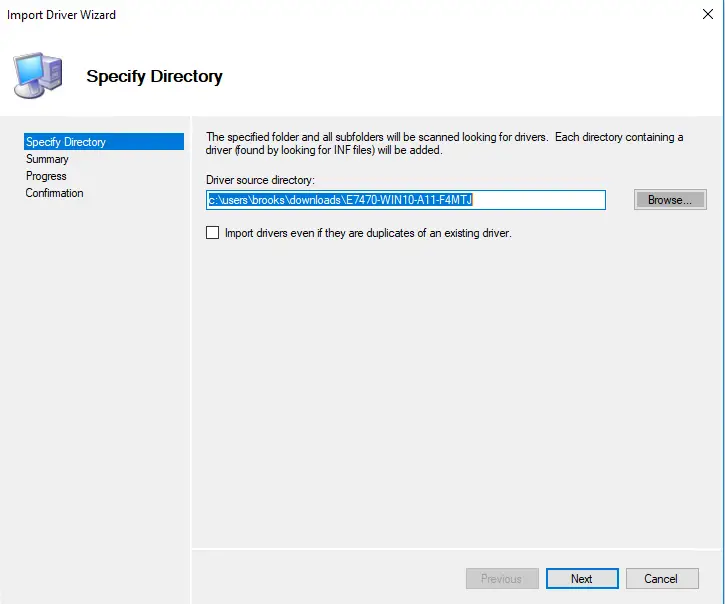
Click Next, Next and Finish to wizard and import.
Repeat for WinPE 10 drivers.
In Deployment Console, expand “Advanced Configuration > Selection profiles”.
Create New.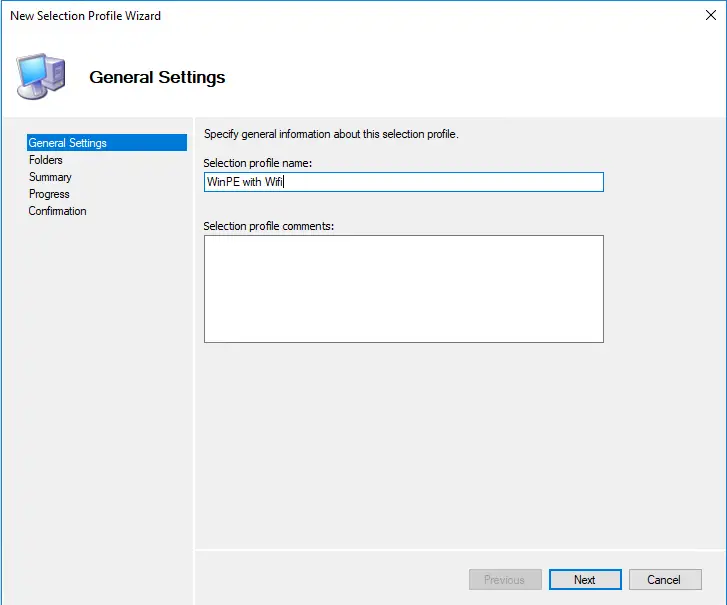
Select your Model(s) along with WinPE 10.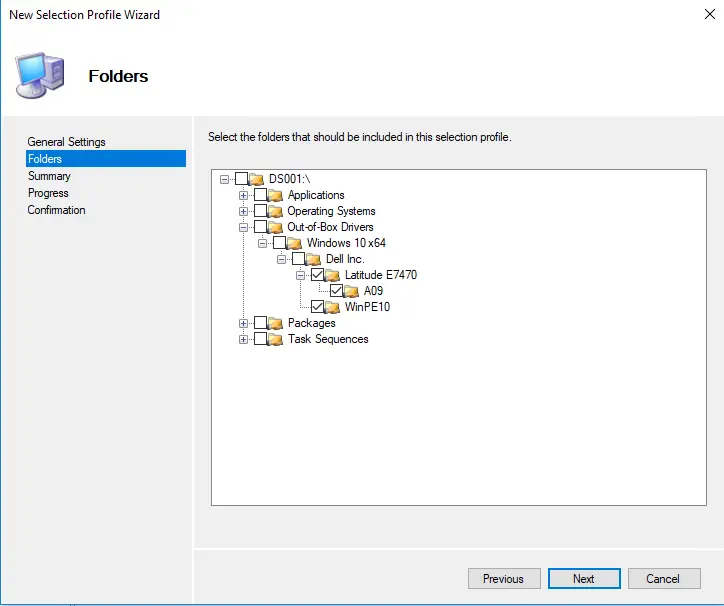
Click next, next and then finish.
Go to properties of Deployment share and then Windows PE.
Click on “Drivers and Patches” tab and select the selection profile we just created. (Ensure you are on the x64 boot image). Select the two boxes for Including all “network” and “mass storage” drivers.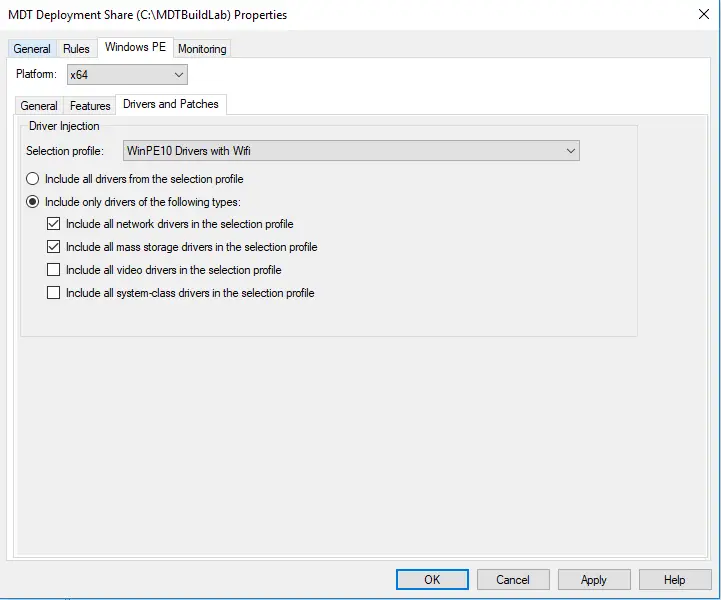
Click Apply.
When we update the Deployment Share later on, the network and storage drivers will be injected into the WinPE image.
Option 2 – Use OSDBuilder
If you don’t want to manage or mess with importing drivers into MDT, you can use OSDBuilder to inject them as part of the PE build process. Simple copy the network folder inside the driver CAB to c:\OSDBuilder\Content\Drivers. I named folders for each and then put them inside: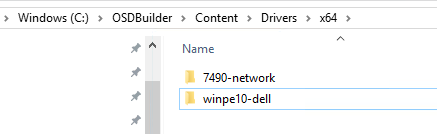
The driver injection process will recurse each of the the folders to get all of the subfolders.
Build WinPE
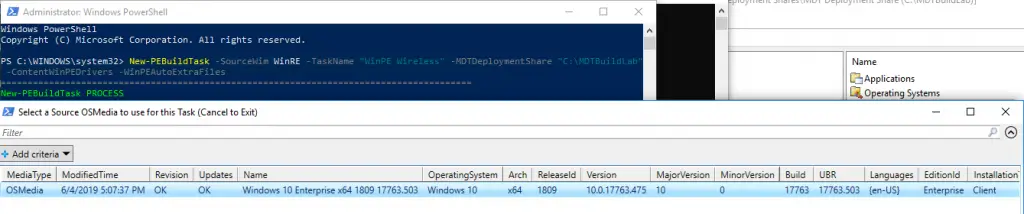
Now we need to create a new PE build task by running this command:
New-PEBuildTask -SourceWim WinRE -TaskName “WinPE Wireless” -MDTDeploymentShare “C:\MDTBuildLab” -ContentWinPEDrivers -WinPEAutoExtraFiles.
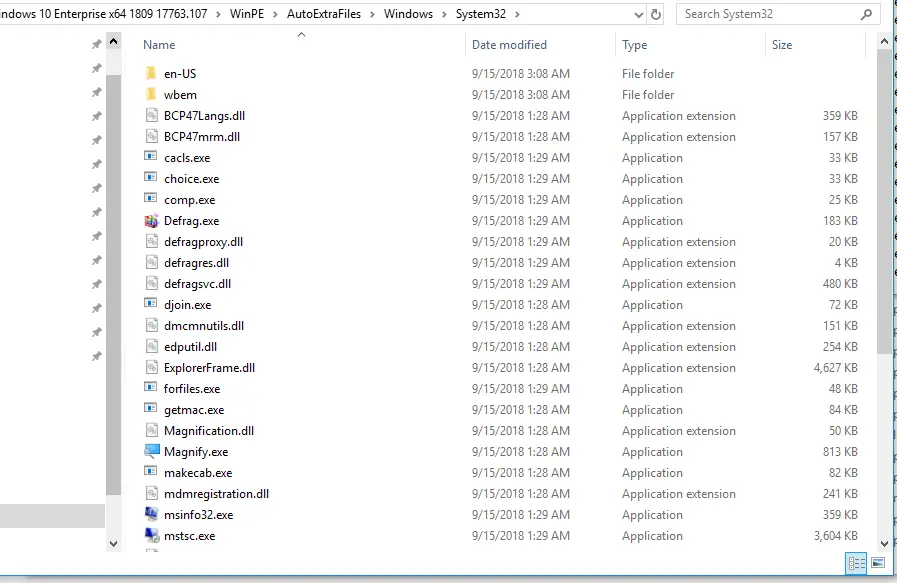
Note: The “WinPEAutoExtraFiles” switch includes a lot of useful things from the media that was imported. In some versions of WinPE this may be required to get WiFi working due to DLLs being missing. The two DLLs are:
mdmregistration.dll
dmcmnutils.dll
However, on updated 1803 WinRE media (10.0.17763.503), I was able to get WiFi working without adding these DLLs at all. But might as well add them as there are a bunch of other handy tools as well!
Select media when prompted and click ok.
It identifies the drivers we placed in C:\OSDBuilder\Content\Drivers. Select them and click ok.
When ready, do New-PEBuild -Execute and select the PEBuild Task we created in the step above:

The process will complete in a few minutes.
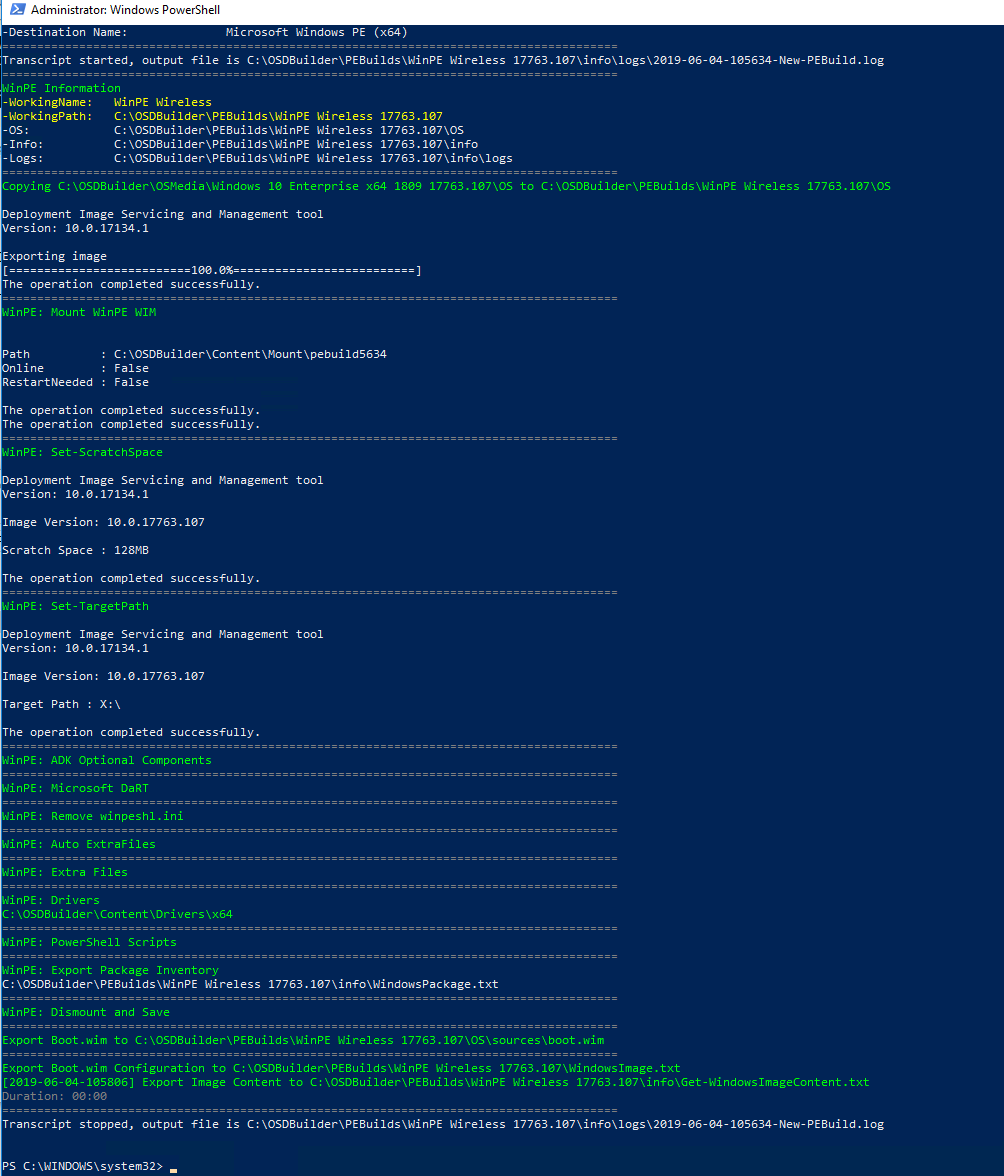
Once complete, you can go to c:\osdbuilder\pebuilds\os\sources\boot.wim or “C:\OSDBuilder\PEBuilds\WinPE Wireless 17763.107\LiteTouchPE_x64.wim” to find your boot image
Now we need to copy this to our default MDT boot image location (Windows 10 ADK install directory) so that any time you update your Deployment Share, it will use this image.
Browse to C:\Program Files (x86)\Windows Kits\10\Assessment and Deployment Kit\Windows Preinstallation Environment\amd64\en-us.
Rename the existing boot image.
Copy the newly create boot image and rename it winpe.wim

Now we need to create a few additional files to enable MDT boot image to automatically connect to you wifi network before starting the task sequence.
Wifi Network XML and wlan.cmd
You’ll need to export your WiFi network from a device that has it properly connected. Generally these need to be WPA/WPA2 networks with pre-shared keys. Technically WinPE supports 802.1x and so it could be possible to connect to that type of network and so if you figure out how, let me know! In my case, my network is called Mockingjay.
netsh wlan export profile name=Mockingjay key=clear
This will create file called Wi-Fi-Mockingjay.xml. Note that this will have the pre-shared key in plain text.
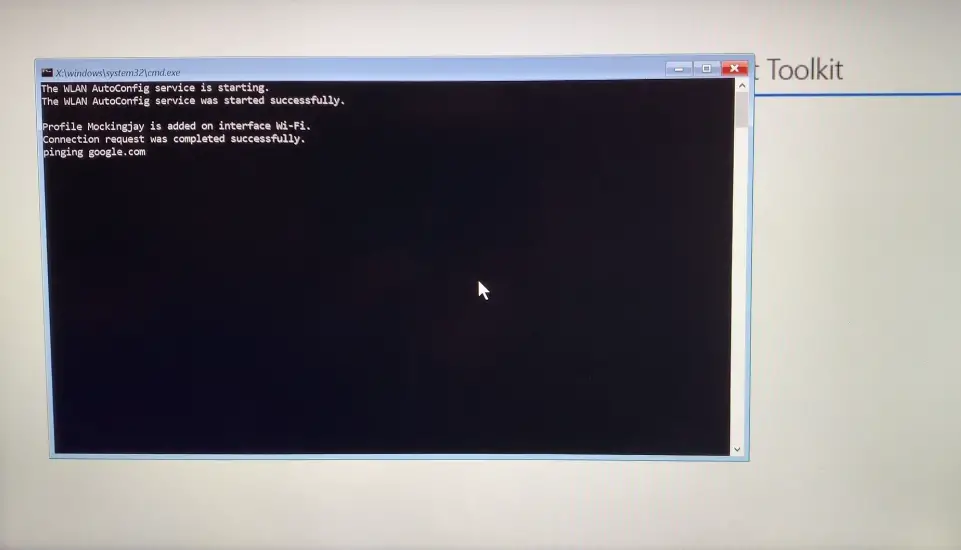
Next let’s create a script called wlan.cmd which will do the actual connecting to the wifi network when WinPE loads. This will start wlan service, load Wi-Fi-Mockingjay.xml, connect to Wifi, and then loop until a valid IP is established and you can ping out to an address. Feel free to adjust the hostname accordingly.
 @echo off
 cd %~dp0
 net start wlansvc
 netsh wlan add profile filename=Wi-Fi-Mockingjay.xml
 netsh wlan connect name=Mockingjay ssid=Mockingjay
 Echo pinging google.com
 :loop
 (ping -n 1 www.google.com | find "TTL=") || goto :loop
 echo Success!
Unattend.xml
This will ensure we call wlan.cmd before the MDT process kicks off (LiteTouch.wsf) once WinPE is loaded.
Create a new file and call it Unattend.xml
Copy and paste the below content inside and save it. You’ll notice we added wlan.cmd as the first “RunSynchronousCommand” before LiteTouch launches.
<?xml version="1.0" encoding="utf-8"?>
<unattend xmlns="urn:schemas-microsoft-com:unattend">
    <settings pass="windowsPE">
        <component name="Microsoft-Windows-Setup" processorArchitecture="amd64" publicKeyToken="31bf3856ad364e35" language="neutral" versionScope="nonSxS" xmlns:wcm="https://schemas.microsoft.com/WMIConfig/2002/State">
            <Display>
                <ColorDepth>32</ColorDepth>
                <HorizontalResolution>1024</HorizontalResolution>
                <RefreshRate>60</RefreshRate>
                <VerticalResolution>768</VerticalResolution>
            </Display>
            <RunSynchronous>
                <RunSynchronousCommand wcm:action="add">
                    <Description>Start Wireless</Description>
                    <Order>1</Order>
                    <Path>wlan.cmd</Path>
                </RunSynchronousCommand>
                <RunSynchronousCommand wcm:action="add">
                    <Description>Lite Touch PE</Description>
                    <Order>2</Order>
                    <Path>wscript.exe X:\Deploy\Scripts\LiteTouch.wsf</Path>
                </RunSynchronousCommand>
            </RunSynchronous>
        </component>
    </settings>
</unattend>
ZTIUtility.vbs
Modifying this script is required so that MDT is able to properly use our Wifi connection as by default this is not supported. Again, big thanks to Oliver on his blog for figuring this out.
Browse to your MDT Deployment share > Scripts and find ZTIUtility.vbs. Copy and paste this file to make a backup of the original.
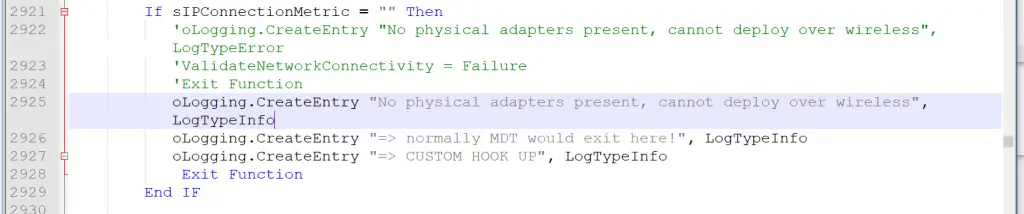
Edit ZTIUtility.vbs
On line 2921, comment out the first 3 lines and then add a few more:
ExtraFiles
We need to add these extra files into our boot image when MDT builds it. The easiest way to do that is to use the “Extra Files” section. First though we need to make the extra files folder.
I like to put this in the root of my deployment share. So I’ve created C:\MDTBuildLab\ExtraFiles.
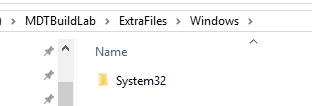
Put the unattend.xml directly in the root of this folder. Then create a new folder called “Windows”

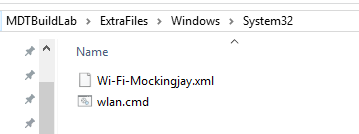
Inside of the “Windows” folder create a “System32” folder
Then inside of that place your wlan.cmd and Wi-Fi-Mockingjay.xml
I’ll show you how to add these to MDT, but you can also use ExtraFiles in OSDBuilder by adding the content to C:\OSDBuilder\Content\ExtraFiles.
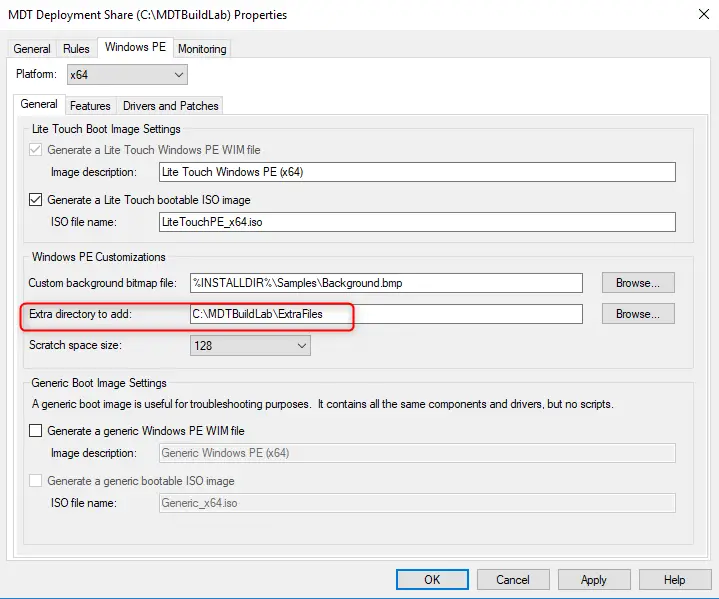
Go to the properties of your Deployment Share and click on Windows PE tab. Select x64 as your platform.
Paste (or browse to it) your ExtraFiles directory here:
Right click your Deployment Share and click “Update Deployment Share”
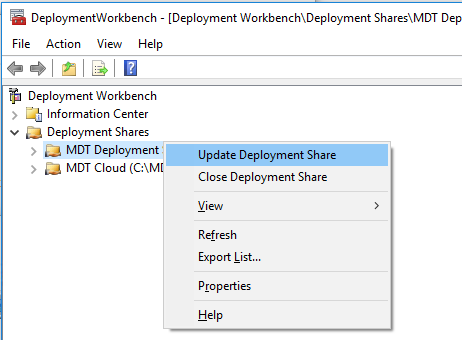
Select “Completely regenerate the boot images”
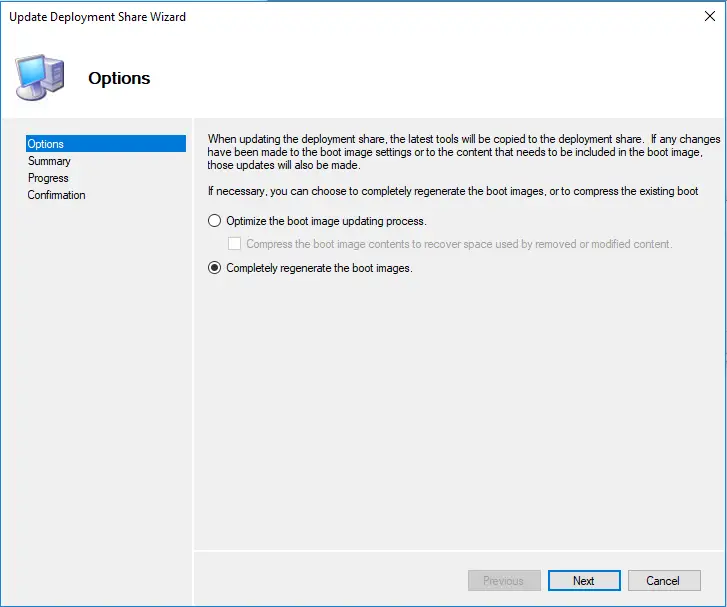
Click Next and complete the wizard.
Once complete, you’ll need to create a bootable USB with the ISO exported to C:\MDTBuildLab\Boot. If you already have a bootable USB, just update the boot.wim file in D:\Sources\boot.wim. Or use this script:
xcopy “C:\MDTBuildLab\Boot\LiteTouchPE_x64.wim” g:\sources\boot.wim /f /y
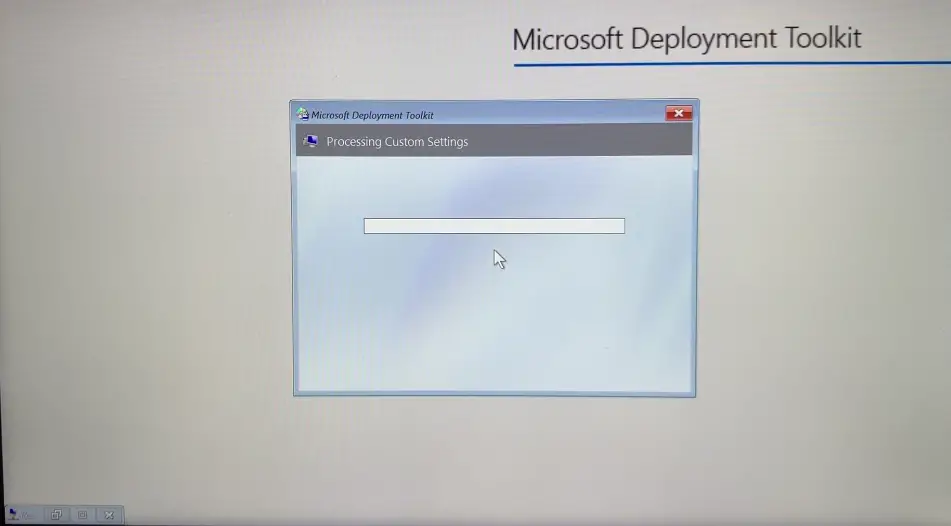
Now let’s boot a test device to see if it works:
Add Wifi connection to Task Sequence
Great we have wireless working in WinPE! But if we don’t also ensure that our task sequence connects to Wifi after the system reboots out of WinPE, then the last half of the TS won’t complete and the build will fail (unless you want to manually connect).
In my Task Sequence, I’ve created two “Run Command Line” steps after the “Install Operating System” step.
Copy Wifi Script
xcopy x:\windows\system32\wlan.cmd %OSDISK%\Temp\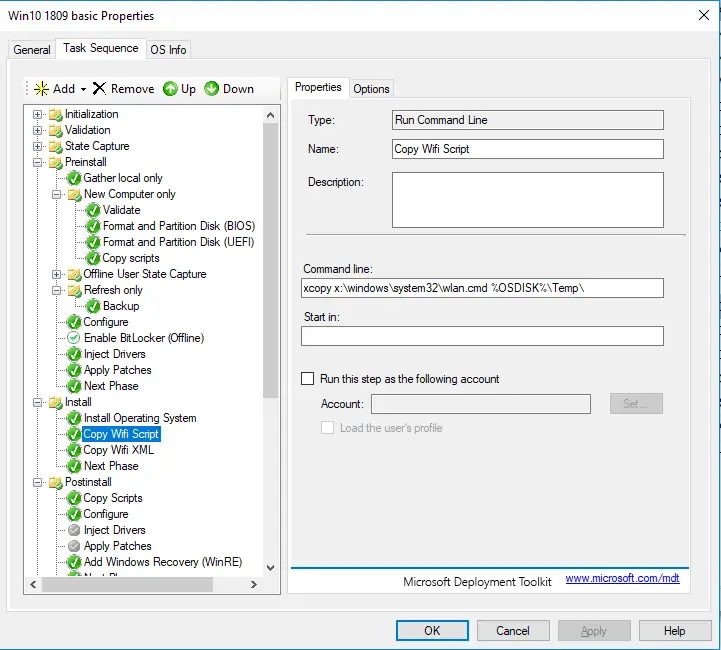
Copy Wifi XML
xcopy x:\windows\system32\Wi-Fi-Mockingjay.xml %OSDISK%\Temp\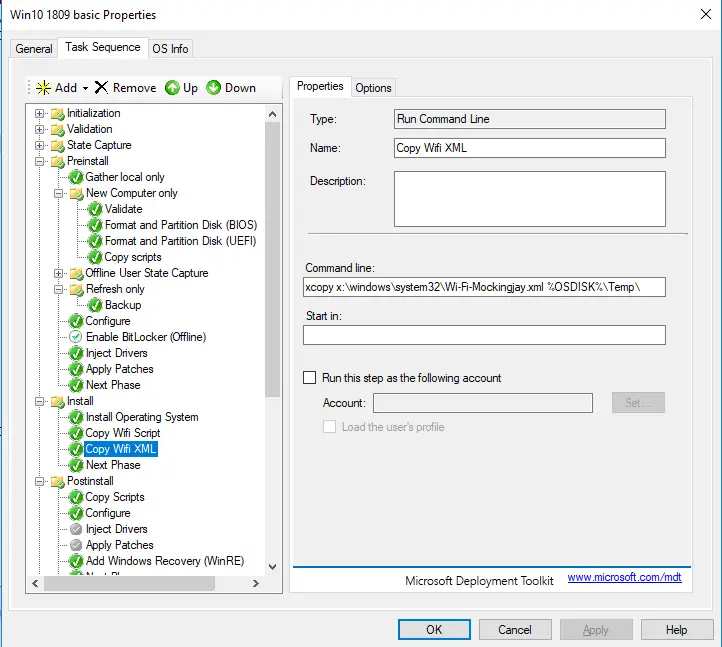
Ok one last step to do! We need to ensure Windows connects to this network automatically before the task sequence runs after it has logged into the administrator account. To do this we need to modify the unattend.xml that is associated with the Task Sequence. Note that this is a different unattend.xml than the one we created for WinPE.
Browse to your Deployment Share > Control > Folder of your task sequence ID. In my case it’s just called “1809”

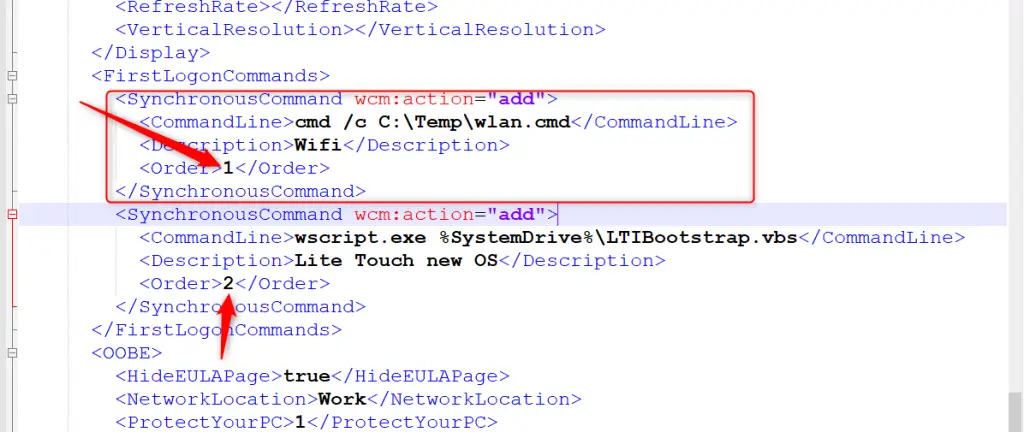
Edit this Unattend.xml (also a good idea to make a backup copy of this in case you make a mistake). Toward the bottom you will see a “FirstLogonCommands” section. We need add a new section BEFORE the Lite Touch new OS one.
Easiest way to do this is to duplicate the whole section (CTRL+D if you are using Notepad++) <SynchronousCommand>stuff </SynchronousCommand>, name it Wifi, and for the command use cmd /c C:\Temp\wlan.cmd. Also ensure that the order is set to 1.
Change the order of the wscript.exe %SystemDrive%\LTIBootstrap.vbs step to be 2.
Save the unattend.xml. Since this lives on the Deployment Share and outside of the boot image, there is no need to regenerate the boot image.
And that’s it! Enjoy your MDT now over glorious WiFi.
First of all, THANK YOU VERY MUCH! Every other guide I’ve seen regarding this uses SCCM which I don’t have available to me. Trying to convert those guides/steps to work with MDT proved a fruitless nightmare. Your guide is easy to follow and duplicating the steps was a breeze. I was able to image an Optiplex 3070 Micro with ease! I noticed the deployment summary was strangely a blank frame, but everything else worked just great. Of course, I also have a question. Do you know if this is possible with Lenovo devices as well? I am trying to do it with some older models and having issues getting them to connect.
Once again, Thank You!
Thanks! Yes, lenovo should work fine. This should work on any hardware type assuming the necessary drivers are added to WinPE .
I second this.. fantastic guide I was able to set this up now thanks to your very detailed guide. Thanks again.
Thanks so much… This guide was such a great help. We are imaging wirelessly now!! We have pallets of Lenovo’s Yoga’s 11E 6th gen that need to be imaged, and just a hand full of USB/NIC adaptors. Auto Pilot and Intune do not meet our requirements, at this time, so we still use SCCM/MDT.
The service name id invalid
More help is available by typing NET HELPMSG 2185
Windows 10 20H2
Doesn’t find wlansvc service
How can you fix it?
This probably means you haven’t imported the WinRE (windows recovery components) properly which include the wifi pieces…
lovely guide but can I get I to work sadly not, tried many times over the course of a week creating new deployment shares of different versions and created osd also
one error i get is
x:\deploy\scripts\litetouch.wsf
line 2925
char 86
syntax error
This means when editing the .wsf file in the past, something is wrong in the syntax of the text, you might want to copy back an original file and re-edit it carefully, check the line its referring to (2925, 86 chars over) to check if you entered something incorrectly.
I would like to post an update to the wifi script in case it might help someone, below batch file will attempt a connection to 5ghz first, then fallback to 2.4ghz, in case you want be able to image faster. 🙂 Just export an additional .XML file for your 5Ghz wifi network profile and add -5G to its name (and be sure to add this to the ExtraFiles section in MDT along with the other one). Apologies in advance if the formatting is off…
@echo off

cd %~dp0

Echo Starting WiFi service and importing profiles...

Echo.

net start wlansvc

netsh wlan add profile filename=Wi-Fi-Mockingjay-5G.xml

netsh wlan add profile filename=Wi-Fi-Mockingjay.xml

Echo.
:wifi50check

Echo Checking for 5.0GHz WiFi Network...

Echo.

netsh wlan connect name=Mockingjay-5G ssid=Mockingjay-5G >NUL

IF %ERRORLEVEL% NEQ 0 ( Echo 5.0Ghz Wifi Network Not Found, Trying 2.4Ghz... & Echo. & goto :connectwifi24 ) ELSE ( Echo 5.0Ghz Wifi Network Found... & Echo. & goto :connectwifi50 )

goto :wifi50check
:connectwifi24

Echo Connecting to 2.4GHz WiFi Network...

Echo.

netsh wlan connect name=Mockingjay ssid=Mockingjay || goto :connectwifi24

goto :wificonnected
:connectwifi50

Echo Connecting to 5.0GHz WiFi Network...

Echo.

netsh wlan connect name=Mockingjay-5G ssid=Mockingjay-5G || goto :connectwifi50
:wificonnected

Echo.

Echo Pinging www.google.com, waiting for response...

Echo.
:trypinging

(ping -n 1 www.google.com -4 | find "TTL=") || goto :trypinging

Echo.

Echo Successful ping, continuing...

Echo.
Rod, Check this out please
this is stock ztiutiliy.vbs
If sIPConnectionMetric = “” Then
oLogging.CreateEntry “No physical adapters present, cannot deploy over wireless”, LogTypeError
ValidatenetworkConnectivity = Failure
Exit Function
End IF
‘TODO Check for VPN connectivity
and this is the modified as per in posted here
If sIPConnectionMetric = “” Then
‘oLogging.CreateEntry “No physical adapters present, cannot deploy over wireless”, LogTypeError
‘ValidatenetworkConnectivity = Failure
‘Exit Function
oLogging.CreateEntry “No physical adapters present, cannot deploy over wireless”, LogTypeINfo
oLogging.CreateEntry “=> normally MDT would exit here!”, LogTypeINfo
oLogging.CreateEntry “=> CUSTOM HOOK UP”, LogTypeINfo
ExitFunction
End IF
line 2925 as you can see starts out after the 3 commented out lines and char 86 is a comma
Hi, not sure I know what you want me to check? For this you will probably want to ask the OP.
Thanks for the guide – this is just what I was looking for!
I have a problem though.. once WiFi is successfully connected, the MDT Task sequence doesn’t kick in. Instead, I get a message saying “Please reinsert the media needed to complete the deployment.
Any ideas?
Did you modify the ZTIUtility.vbs file in your deployment share?
showing invalid credentials error in MDT Wi-Fi, please help but it is properly working with LAN port.